This article will guide you through the installation of the APPS SCRIPT Web App. By this stage our assumption is that you are in possession of the guide documents including the App URL.
Please note: this guide was created by using the “Budget Planner” Web App as an example. However, the steps are applicable to any Web App present in our Shop.
1. OPEN THE APP URL ON YOUR BROWSER
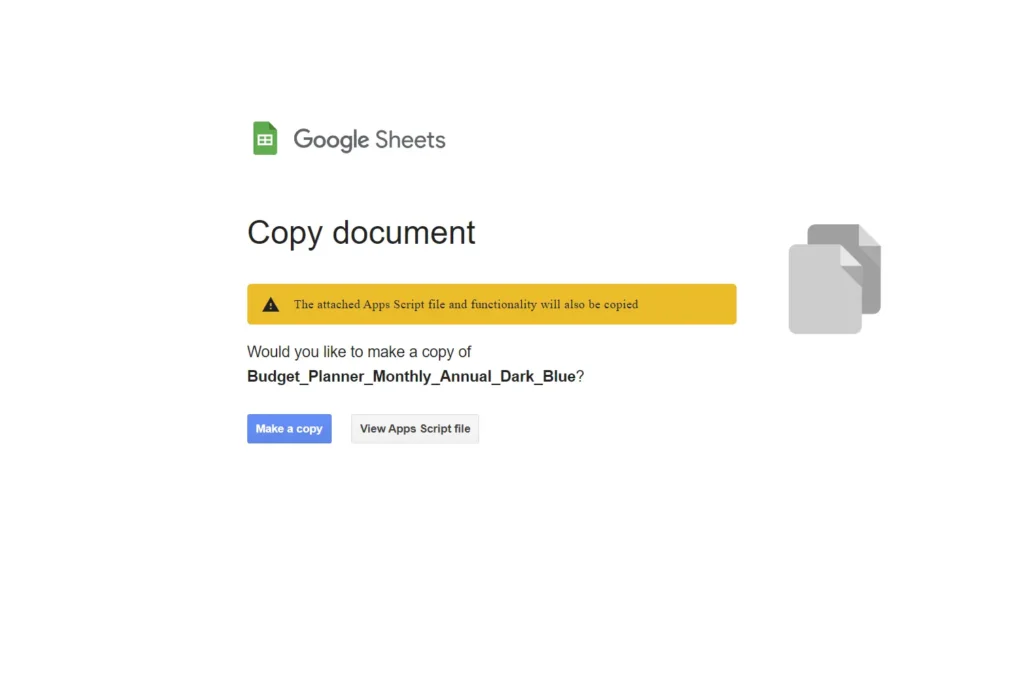
Once you open the URL, it will show the following screen. Click on “Make a copy” in order to clone it on your own Google Drive:
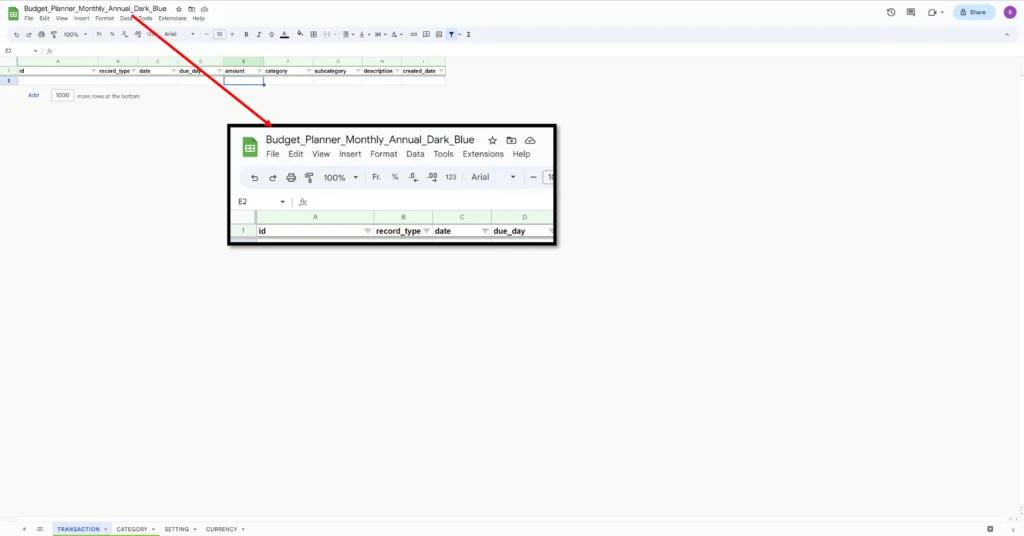
The file name will have the word “Copy” at the front.
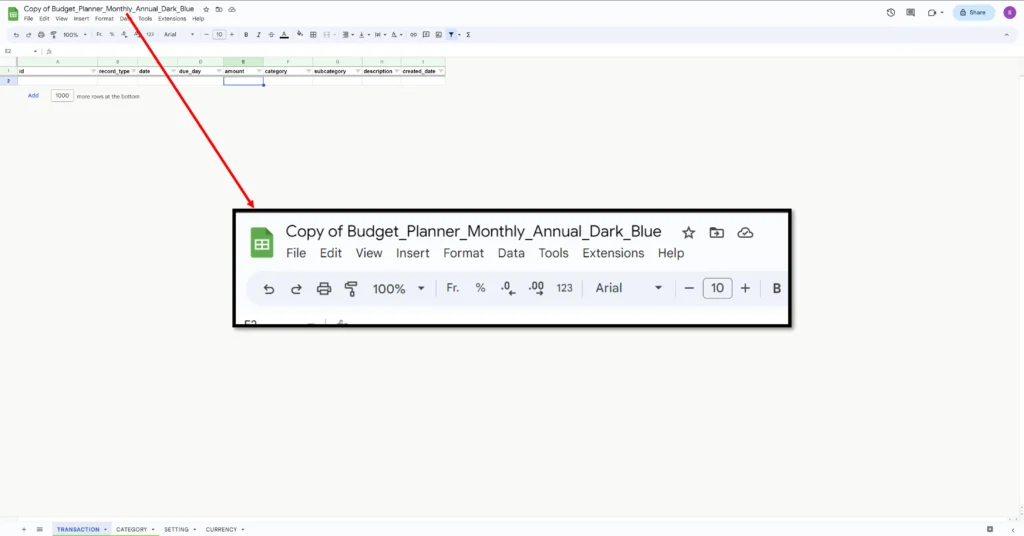
Change it by removing “Copy of”:
2. MOVE THE APP IN A DEDICATED FOLDER
As a best practice we’ll move te app in a separate folder to avoid mixing it up with other files.
Click on the icon shown in the below image and then click the new folder icon
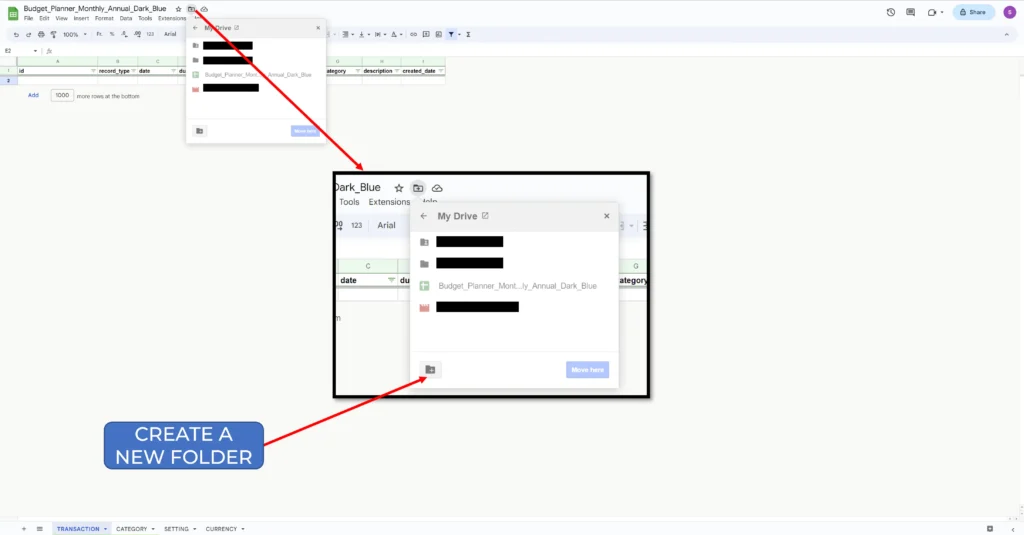
Name the folder “Budget Planner”
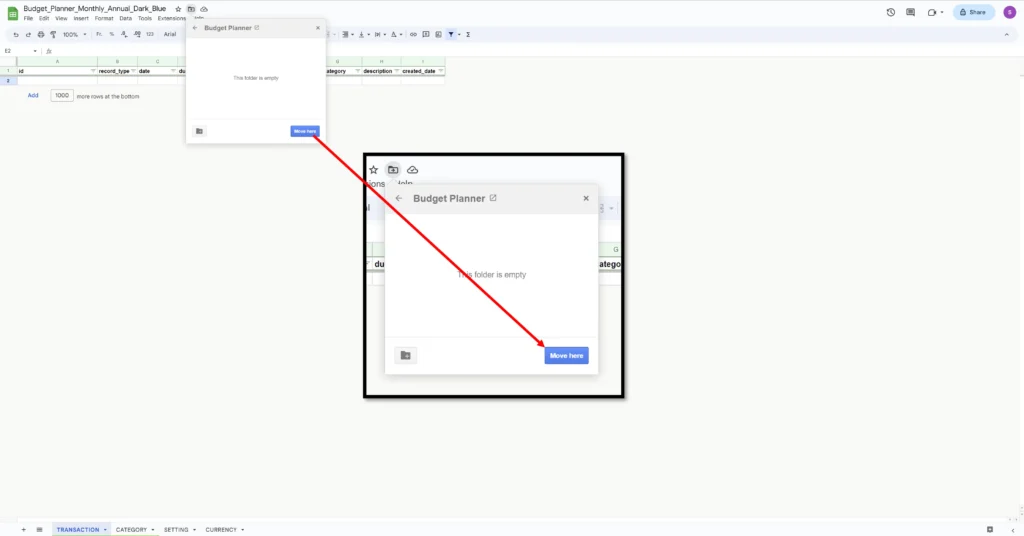
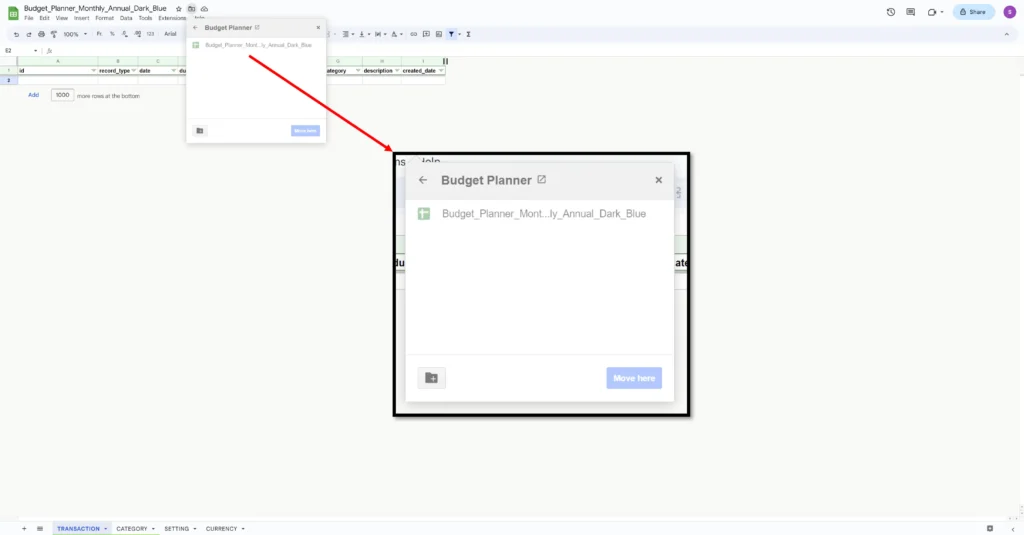
Therefore move the file into the created folder:
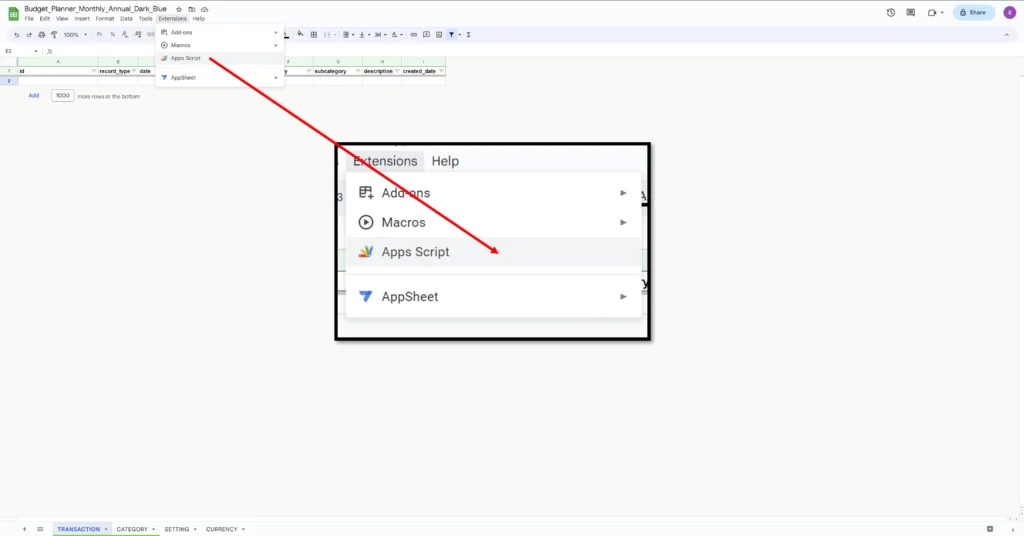
3. DEPLOY THE WEB APP
Let’s deploy the Web App.
From the top menu, click on “Extensions” then on “Apps Scripts”.
You should land on the following page.
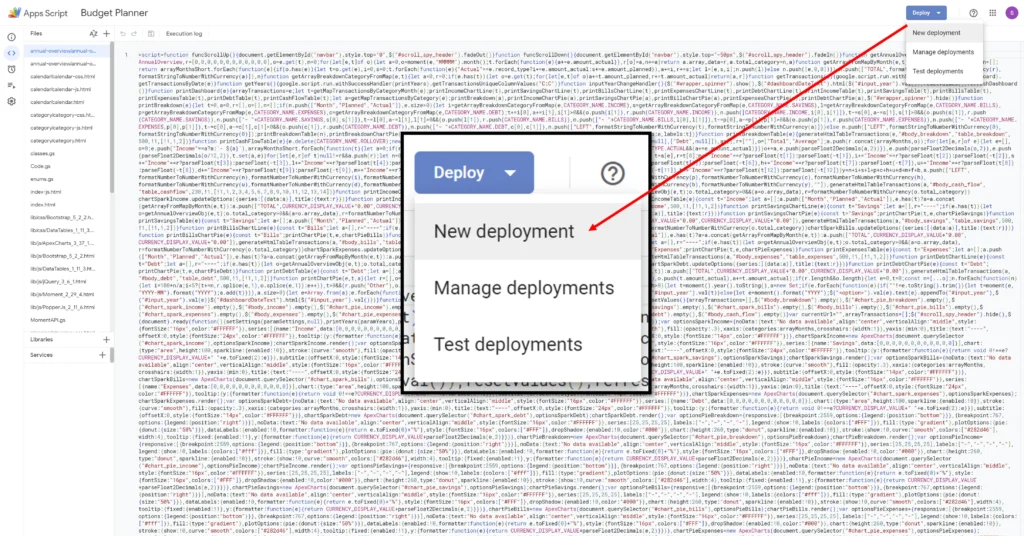
On the top right hand corner, click on the button “Deploy” then choose “New deployment”.
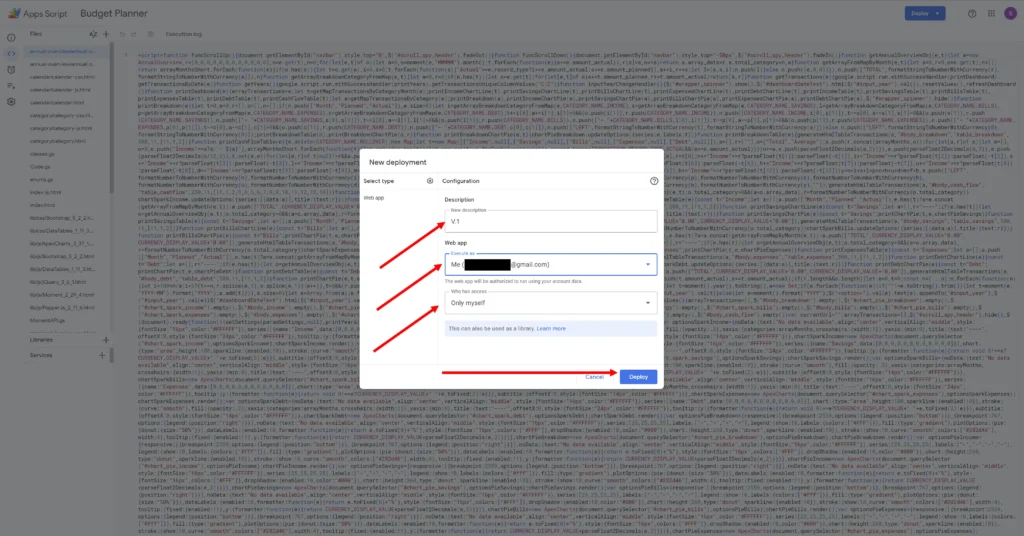
Give it a “V.1” version and set the following options, then click “Deploy”.
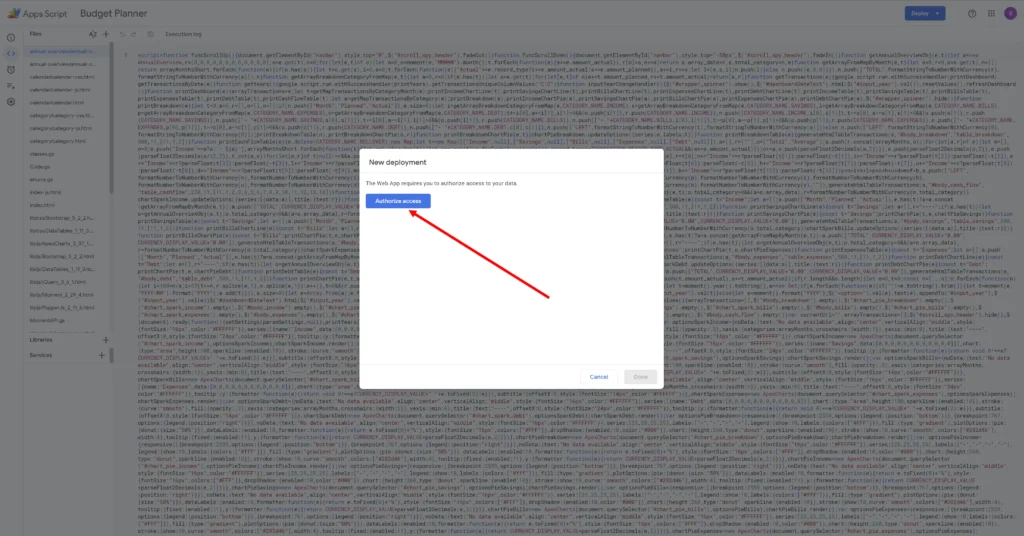
Click on “Authorize”
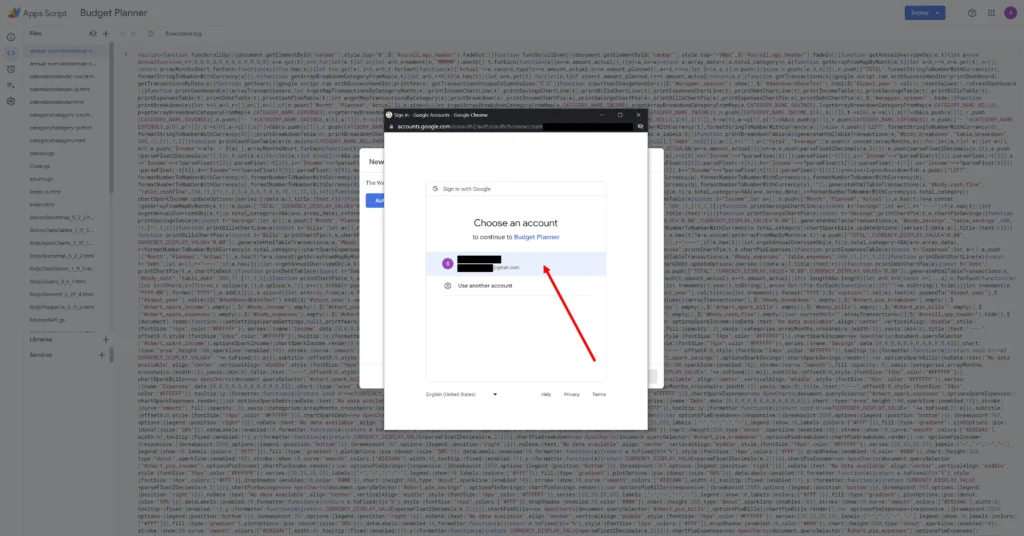
Select your Google Account.
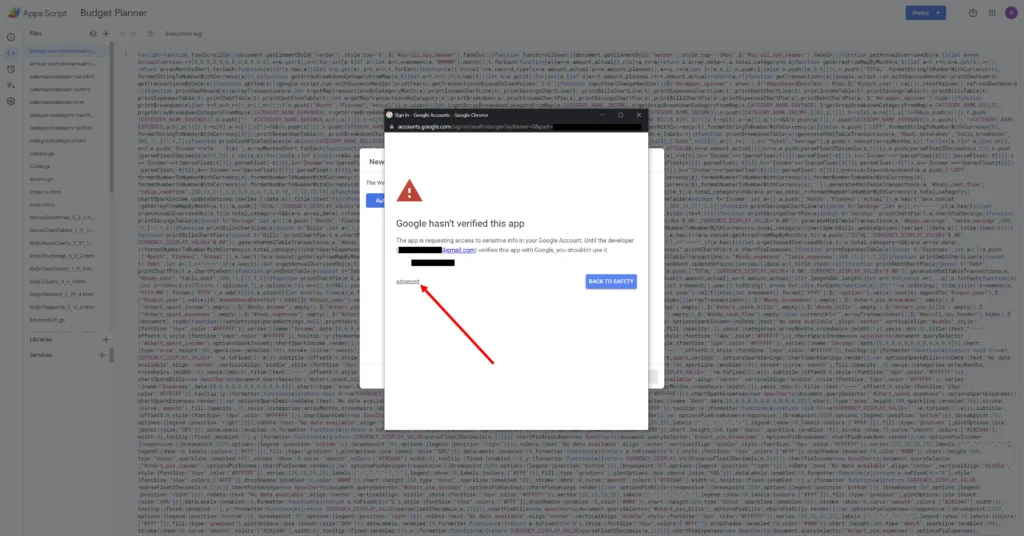
Authorize Google to use the Web App. Don’t panic about the message. This is needed to provide Google the permission to use the App.
Click on “Advanced”
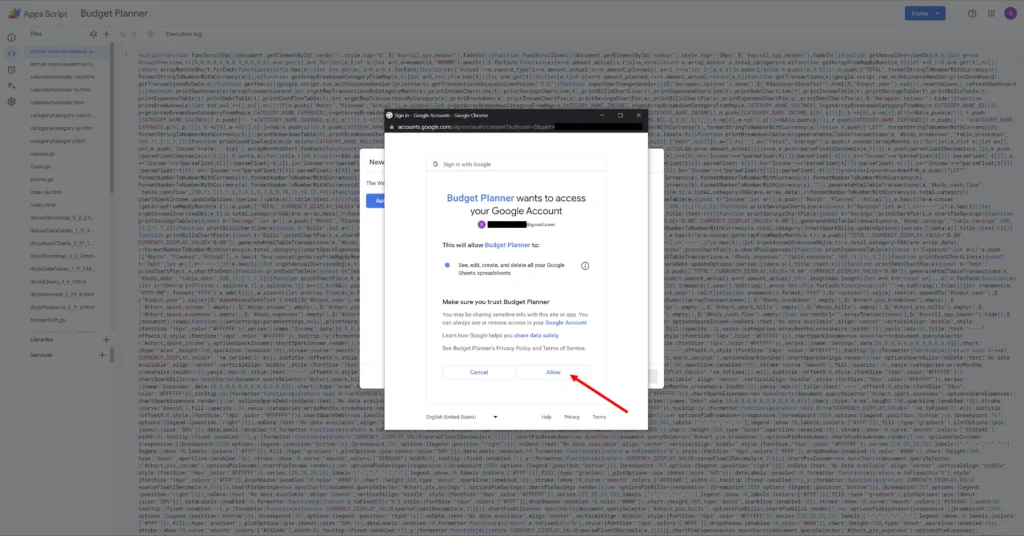
Then click on “Go to Budget Planner”

Click on “Allow”
4. LAUNCH THE WEB APP
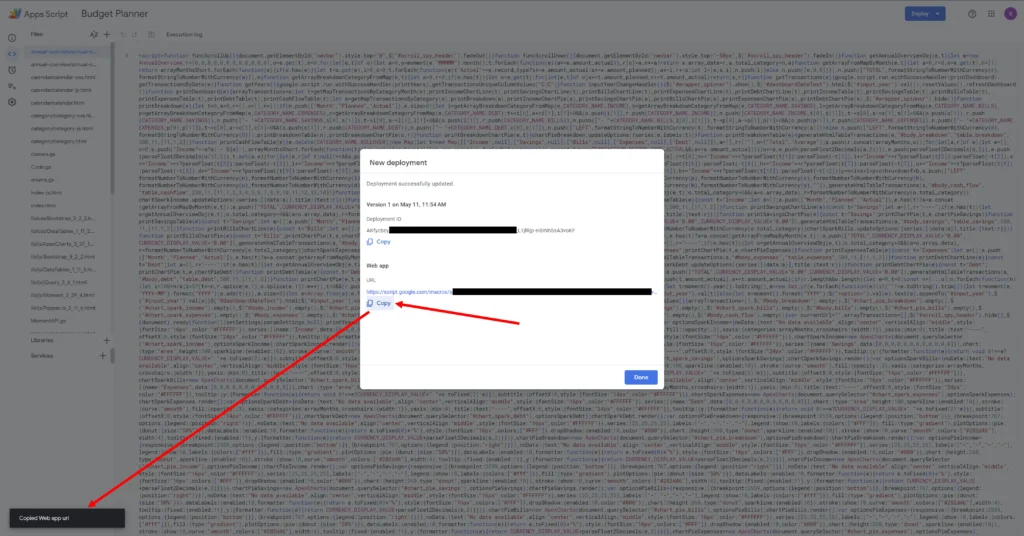
Once you allow the Web App to access your Google Account, you will get the Web App URL.
We recommend to bookmark it so that you have it always handy to access your Web App.
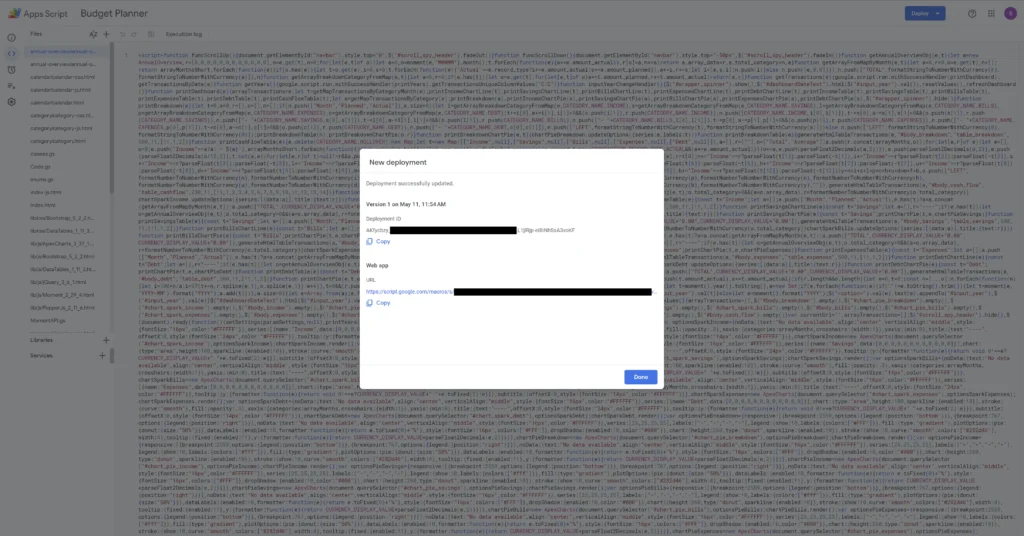
Copy the Web App URL and paste it into a new tab in the browser
The Web App will open up in the browser
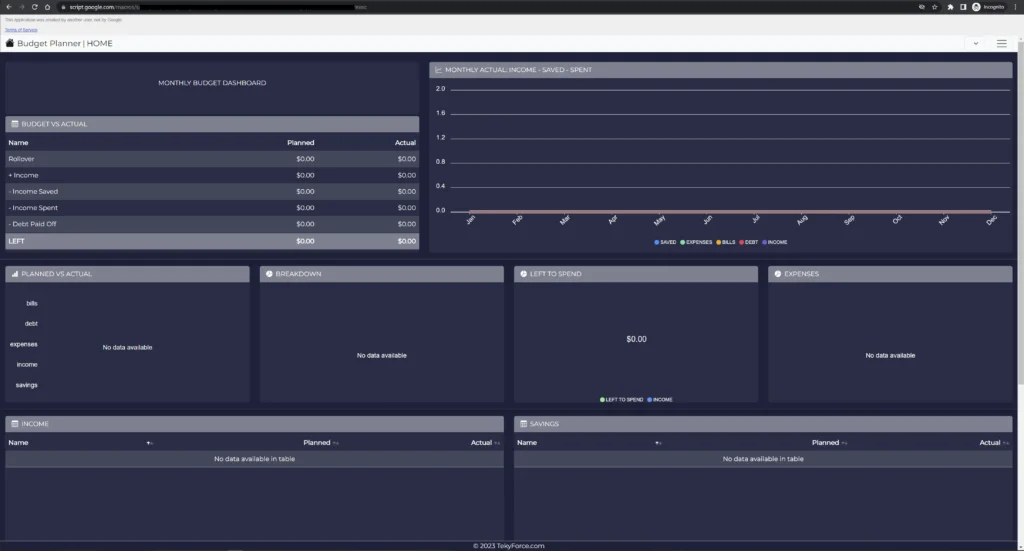
We hope you enjoy the Web App.
For any questions please do not hesitate to leave us a comment down the page or reach out to us via email which you’ll find in the Contact page and well’be more than happy to support.